A boat with a sail

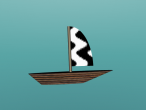
A classic boat has a main body (hull) and a mast with a main sail. Using the build-in primative objects, there could be some possible boats contructed. In this blog, I used three objects: a SNOUT for the hull, a CYLINDER for the mast, and a 2D PIE for the sail. Of course these objects are scaled and textured with materials and images to be looking like (I hope ![]() ) .
) .
Let's see the end product first. Feel free to drag and examine this simple 3D boat.
Below is the Logo program that creates this boat. I will explain some key ideas in the codes.
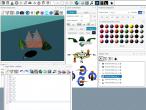
In line 3, a TRANSFORM object is created to be the parent of the whole boat. As the first object, its object id will be obj_0. This id is stored in a variable named "boat as can be seen in line 4, and line 5 indicates that this obj_0 object will be parent of any subsequent objects created, unless the SETPARENT is used again to "root or other transform object's id.
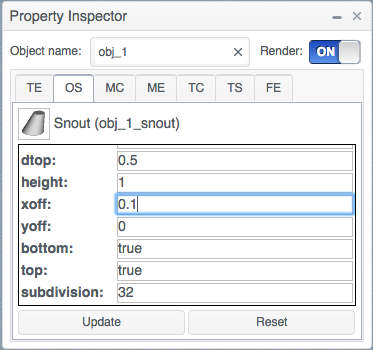
Then there is scaling and a rotation prepared for the SNOUT object to be looking like the hull. The special syntax in line 8 allows you to specify properties of the object. To do so, firstly, the whole line must be enclosed in brackets ( ). Then, you will need to know what properties does that object have. To know properties of an object, the easy way is to create a default on and click on it to inspect in the Property Inspector - OS tab window. Lastly, the property and value must be specified in curly brackets { } in the format of property_name : value, and use comma to separate if more than one property are specified.
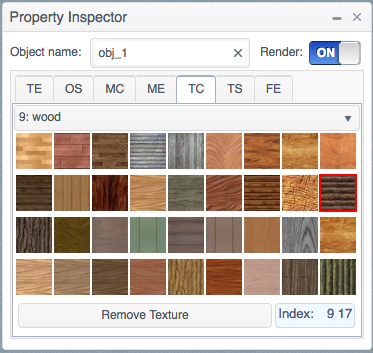
The next line (line 9) is the programming way to apply image texture onto a 3D object. Firstly, we need to SELECT the object as if we use mouse to click on the object, then SETIT is the command to apply build-in textures. The indexes specified are 9 and 17, which means set 9 and item 17 in the Property Inspector - TC tab.
From line 10 to 25, the mast and sail are created under another TRANSFORM object. This is for later to animate the sail. There are some movements of the turtle to place these two objects. And in line 25, SPIN command is used and very easily, the mast and sail are spinning in the right turn direction every 60 seconds.
From line 27 to line 30, the boat's movement on sea surface is simulated. Unlike SPIN that can create automatically all animation objects and commands, this animation specified the animation objects including TIMESENSOR, ORIENTATIONINTERPOLATOR (or ORIINT) and ROUTE as per X3D standard. TIMESENSOR specifies the animation cycle (6 seconds) and loop of the animation (true). ORIINT specifies the animation key ([0 0.1 0.25 0.65 1]) and values ([[0 0 1 0][0 0 1 -0.1][0 0 1 0][0 0 1 0.15][0 0 1 0]]) . As can be seen, the key has 5 values between 0 and 1 (beginning and end of animation) and so there are 5 set of orientation values corresponding to it. The five keys are not linear so you can feel that the boat wobbles slow and fast. A orientation value has 4 numbers such as the first one here [0 0 1 0]. The first three numbers represent the rotation axis as a vector. The last number is the rotation on the axis in radian using right-hand-rule (RHR). Well, there are only 30 lines but I think there is a lot to know. Anyway, please leave a comment or question below if any.
- Andy's blog
- Login or register to post comments
- 5394 reads

