Virtual Art Gallery

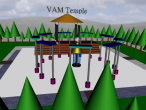
Ever wanted to have your own Art Gallery? Well, you can create your own in VRMath2 Editor and share on VRMath2 Community blog to your friend. After few hours of Design and Create, I am happy to share with you my first Gallery.
In the 3D Virtual Gallery, you can drag your mouse to move around in the 3D space and see if you can walk up and down the floors. If you ever got lost in the 3D space, you can always press "R" key to reset the viewpoint, means you will return to the beginning location and direction to start over again.
The design process involved many drawings of floor plans and measurement. The size of this Gallery structure is 40 x 40 x 10 (W x L x H in metres). There are two floors so each floor is five meters height. I have chosen mostly glass materials so you can look through the middle floor and the walls to the outside landscape. There are four stair cases at the four corners connecting the two floors. I placed a tree under each of the four stair cases. The tree is in fact a background transparent GIF image so it looks like a tree but flat. All pictures are hanging down from the ceiling with a thin wire. There are a total of 31 pictures displayed in this Virtual Art Gallery at the moment. One of them is a famous drawing. Can you find it? If you do, leave a comment below and let us know where it is (describe the location and direction to get there). I have also designed to put a single light at the top ceiling. It turned out that a POINTLIGHT can create quite good lighting effect in the Gallery. I have also thought about having some SPOTLIGHT for individual picture but did not do it. Maybe you can experiment for me.
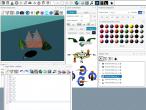
The create process involved many trials and errors. Mostly I wrote the Logo program in the Logo Editor, click on Run to create the virtual world, then navigate to see if it is as designed. This is a cyclic process and I have been through many iterations between the design and create. The whole Logo program is long (about 130 lines). However, most of them are procedural, which means, step by step such as moving the turtle to a location and place a picture frame.
As you can see, there are some patterns in this Gallery. For example, the four stair cases at the four corners. I have carefully used REPEAT to achieve this and also the walls and floors.
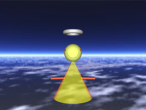
For the hanging picture frame, I have written four procedures for two different heights (5m and 10m) and two different picture orientations (portrait and landscape). Below is an example of a picture frame from top ceiling (10m) and for portrait pictures.
Please leave me a comment if any questions on the scale and movements.
You may also download my program and modify to suit your design (and use your own art works). 
Files: virtual_gallery.x3d virtual_gallery.logo
- Andy's blog
- Login or register to post comments
- 5451 reads

